
How to create patterns using bleach
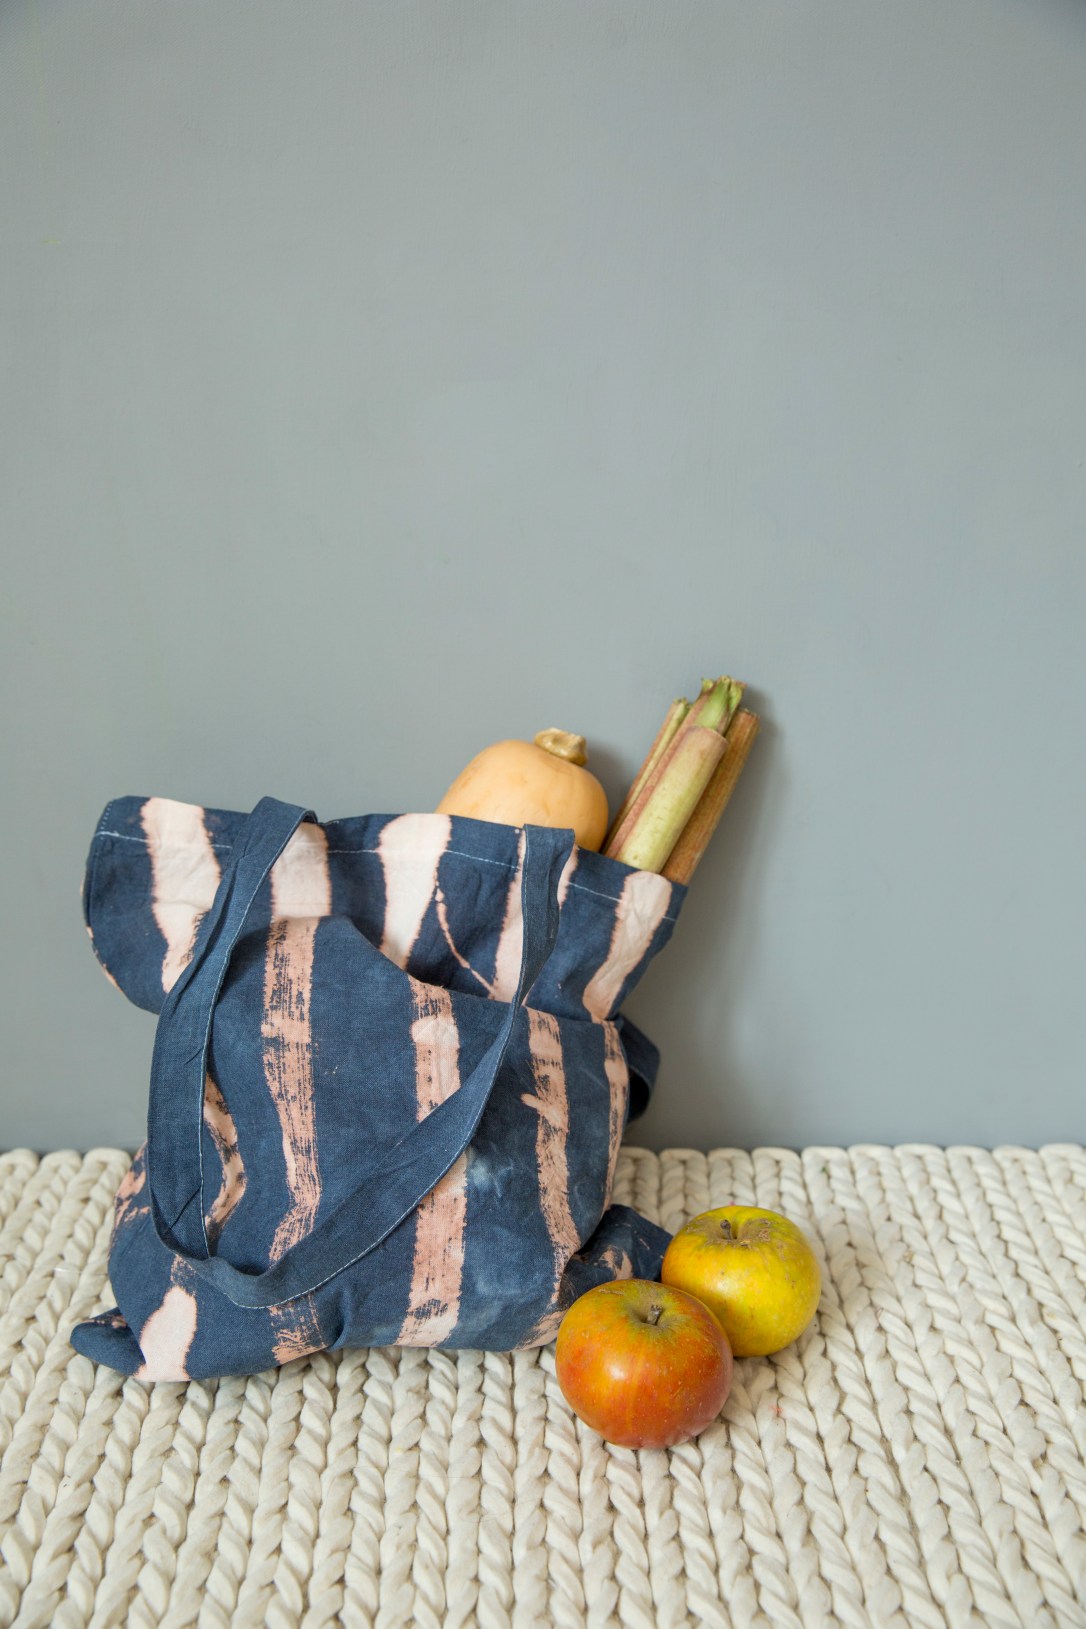
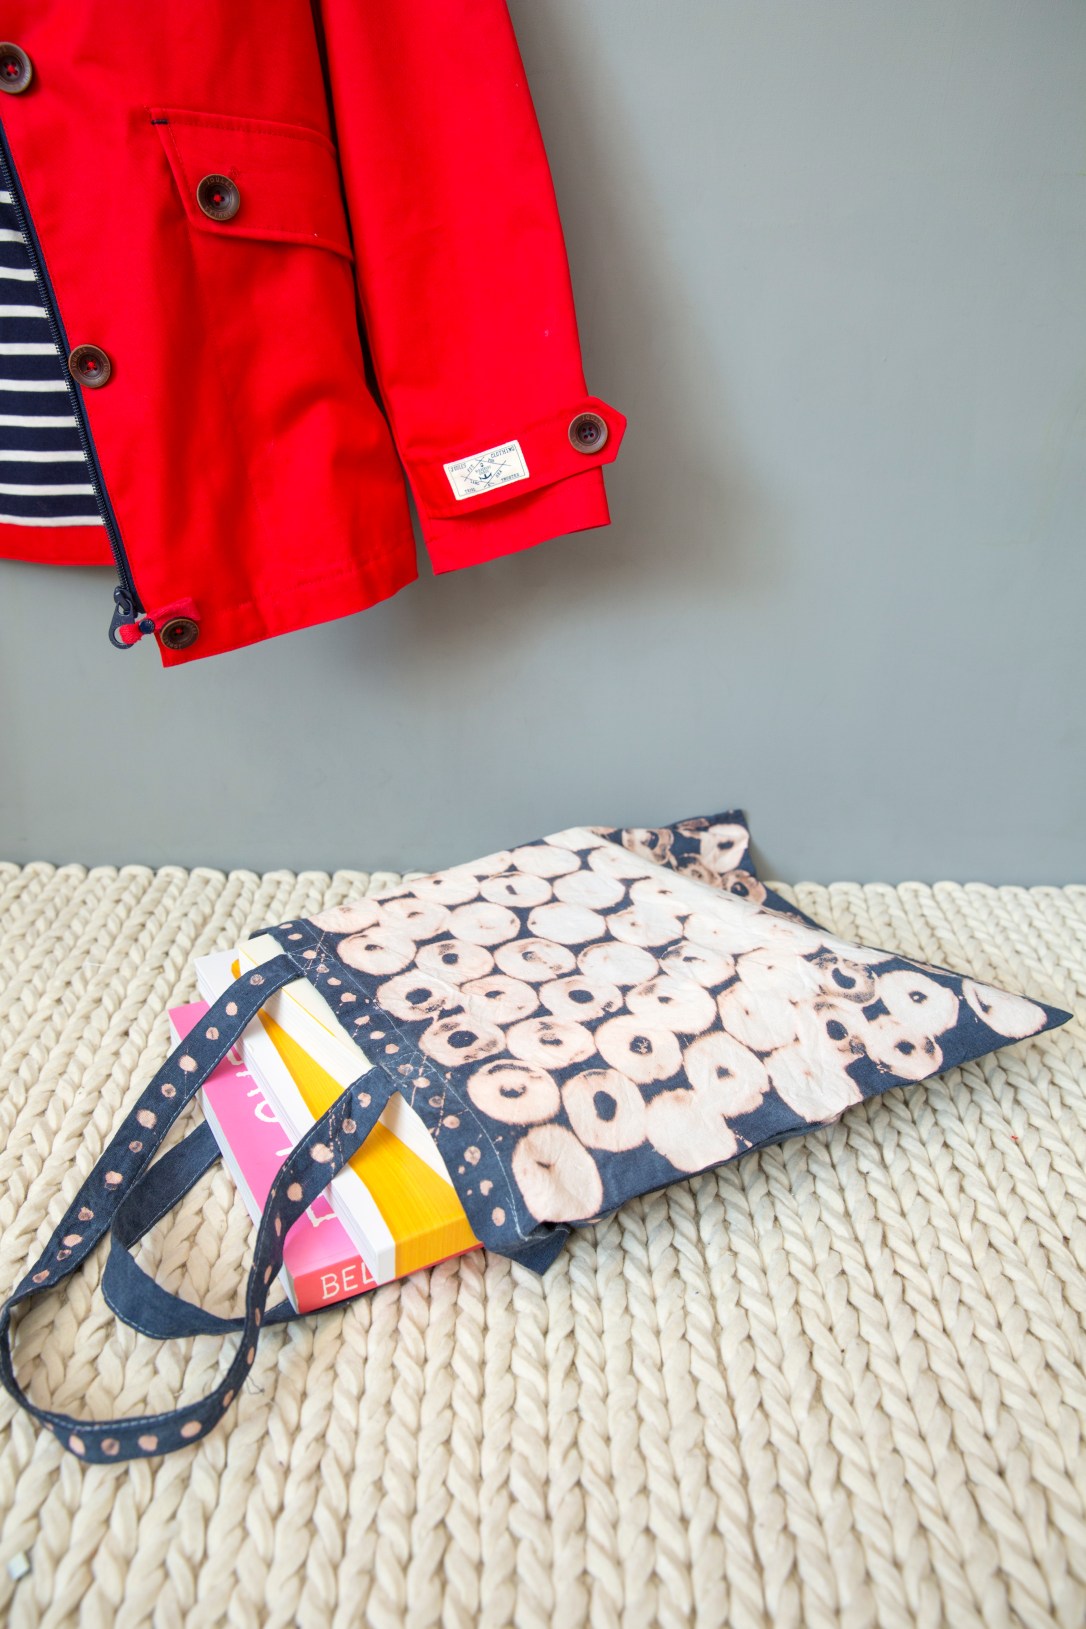
Ok so we’ve all done it, been cleaning a work surface and inadvertently brushed up against it and ended up with a bleach blob on a much loved garment. This got me thinking about using bleach in a positive way. I dyed some cotton bags in Jeans blue dye and then I applied the bleach in patterns.
Just a quick note before you start:
Don’t attempt this project anywhere near children and protect anything including work surfaces, garments and skin that you don’t want marked with bleach. Use with caution and wear rubber gloves.
You will need
Cotton bags
Jeans blue hand dye
Bucket
Salt
Bleach
Small container
Pencil with an eraser on the end of it
Small piece of pipe lagging (optional)
Paint brush
Rubber gloves
Paper or plastic, to insert into the bag whilst working on it.
Tip : When printing use something with a long handle so that you can hold it and apply the bleach without getting bleachy thumb prints on the bag.
- Mix the dye with salt according to the manufacturers instructions. Dye the bags.
- Place the bags under running water until the water runs clears. Hang up to dry.
- Iron the bags flat.
- Place a piece of paper between the font and the back of the bag so that as you work the colour won’t seep from the front to the back.
- Put on your rubber gloves, pour the bleach into a small container.
- Apply the bleach to the bag. Create stripes using a paint brush and long strokes. Make zig zags as you did the stripes using a decorators paint brush. Make dots by placing the eraser end of the pencil into the bleach and applying it to the bag. Use lagging, for central heating pipes, by dipping this in the dye and then placing on the bag in rows. As you work first of all the bleach doesn’t show but over time it changes to a copper brown colour then to a pinky hue and lastly a washed out pinky white.
- Leave to dry and then hand wash.

Credits –
Fabric dye – Dylon (http://www.dylon.co.uk/)
Rugs – Flair Rugs (http://flairrugs.com/)

